So, I know i'm a little late posting this since Halloween has now past, but I still need to show how my costume turned out. In the last post, I left off having begun making the mold of the mask sculpt. I'll get back to that but first I need to show how I made the rest of the costume. The vision I had for the costume was for it to be intimidating as a large hulking monster. It didn't exactly come out a big as I wanted But It was still good enough. So, what I did was I bought some 4 inch thick sheets of upholstery polyfoam (the kind you use for couches and pillows). I bought it at hobby lobby because it seemed to be the cheapest place to get it, though it still was about 30 dollars in total. Anyway I bought the foam in order to create a "muscle suit" to make me closer to the imposing size of the character Kurse. So I found an old tight fitting longsleeve shirt that I cold glue the foam pieces to. I also bought a cheap electric kitchen knife to cut the thick foam with, since it can be difficult to cut with just scissors. So you can see the progress picture below of the chest and abs cut from blocks of foam. They were glued to the shirt with 3M spray adhesive.

So after I cut out some more muscle pieces out, my brother helped me glue them to the arms and this is what it looked like.
After starting the foam suit, I continued with the mask mold. I finally bought some more plaster and finished layering the front half. I didn't get any pictures of this but after it was done I pried the two plaster halves apart with some screwdrivers stuck in the wedge holes I had made in the edges with clay. I had no problems taking them apart after some careful prying, thanks to the vaseline mold release. So once they were apart I was able to easily remove the clay and styrofoam head and was left with two decent looking mold pieces. That is the face half in the picture below, and it came out pretty clean with only a few minor air pockets.

So the next step was to cast the mask with silicone rubber. Unfortunately It isn't too cheap but I bought some PlatSil Gel 10 silicone rubber from BITY Mold Supply. PlatSil Gel 10 seemed like the best choice because it had high tear resistance and also was translucent. This was most important because translucent meant it could be dyed different colors. So I was able to mix it up with some black acrylic paint which surprisingly doesn't cause and problems with the curing of the silicone. One of the feature of PlatSil Gel 10 is that it has a very fast cure time (only 30 min) but this means the working time with it is very fast (6 min). This can be a bit of a problem if you have to spread it out over the entire surface of the mold and you don't have any to waste. It took a couple coats of slilicone on each of the two halves of the mold and then also another coat along the seam once the two halves are closed and pressed together. Again, I should have taken more pictures of this process but hopefully you get the idea of how it worked. This picture below shows the first coat of silicone in the back half of the mask mold.

Somewhat to my surprise, the mask turned out very good with very few problems! I used the entire 2 pounds of silicone but the mask was still quite thin. Fortunately, this type of silicone is very strong and durable so despite some thin spots, it retained it's shape and held together very nicely. The neck could easily be stretched over my head to put it on and there was decent air flow space in it since it didn't fit extremely tightly against my face (unlike my previous red skull mask). So all in all I was extremely pleased with my latest rubber casting project. You can see me wearing it below along with the foam costume which I made more progress on.
The mouth of the mask didn't match up with mine exactly and it stuck out quite a bit in front of mine but I could still open and close it slightly with mine.

Unfortunately, Halloween only a couple days away at this point so I had to work very fast to get the suit done and the mask. Sadly I was not able to completely finish the costume in time but this picture below is as far as I got with it on Halloween night. After finishing carving the foam muscles and gluing them on, I glued some cheap greyish black fabric over the whole suit. Also I forgot to mention the shirt was cut open in the back and then had vel-crow attached to close it. This allowed it to be taken on and off easily. The suit was acceptable, but it wasn't as done as it was supposed to be. I wanted to make the shoulders bigger and put some foam spikes on them. Also I wanted more detail and color in general, to make it more accurate to the actual Kurse look, but I didn't have the time. As for the mask, it also was not done since I wasn't able to attach the foam horns that I had made. I was able to paint it a reddish color on the face which turned out ok. The most disappointing thing I have learned about silicone is that the only thing that sticks to it is more silicone. The only reason this acrylic paint worked was because I airbrushed it as a very light coat so it wouldn't end up cracking and peeling off. It does still rub off if handled too much. The reason I wasn't able to attach the horns was that the glue I used wont even stick to the silicone rubber. So the only way to attach them was to stick them on with more uncured rubber and let it dry to secure the foam to the mask. Since I didn't have any silicone or time left I just had to go without them.

Heres a picture of Kurse from the movie "Thor: the Dark World" for comparison. Not as acccurate as I wanted it to be I guess. The horns would probably make it look better though.
So take a look at the rest of the picture taken on halloween night and decide for yourself if it was a success. It didn't creep out as many trick or treaters as my red skull costume did last year but oh well.
Here are the horns that I made and wasn't able to attach. the are coated with latex and were supposed to be shaded with black spray paint but some of them got a little too much color.
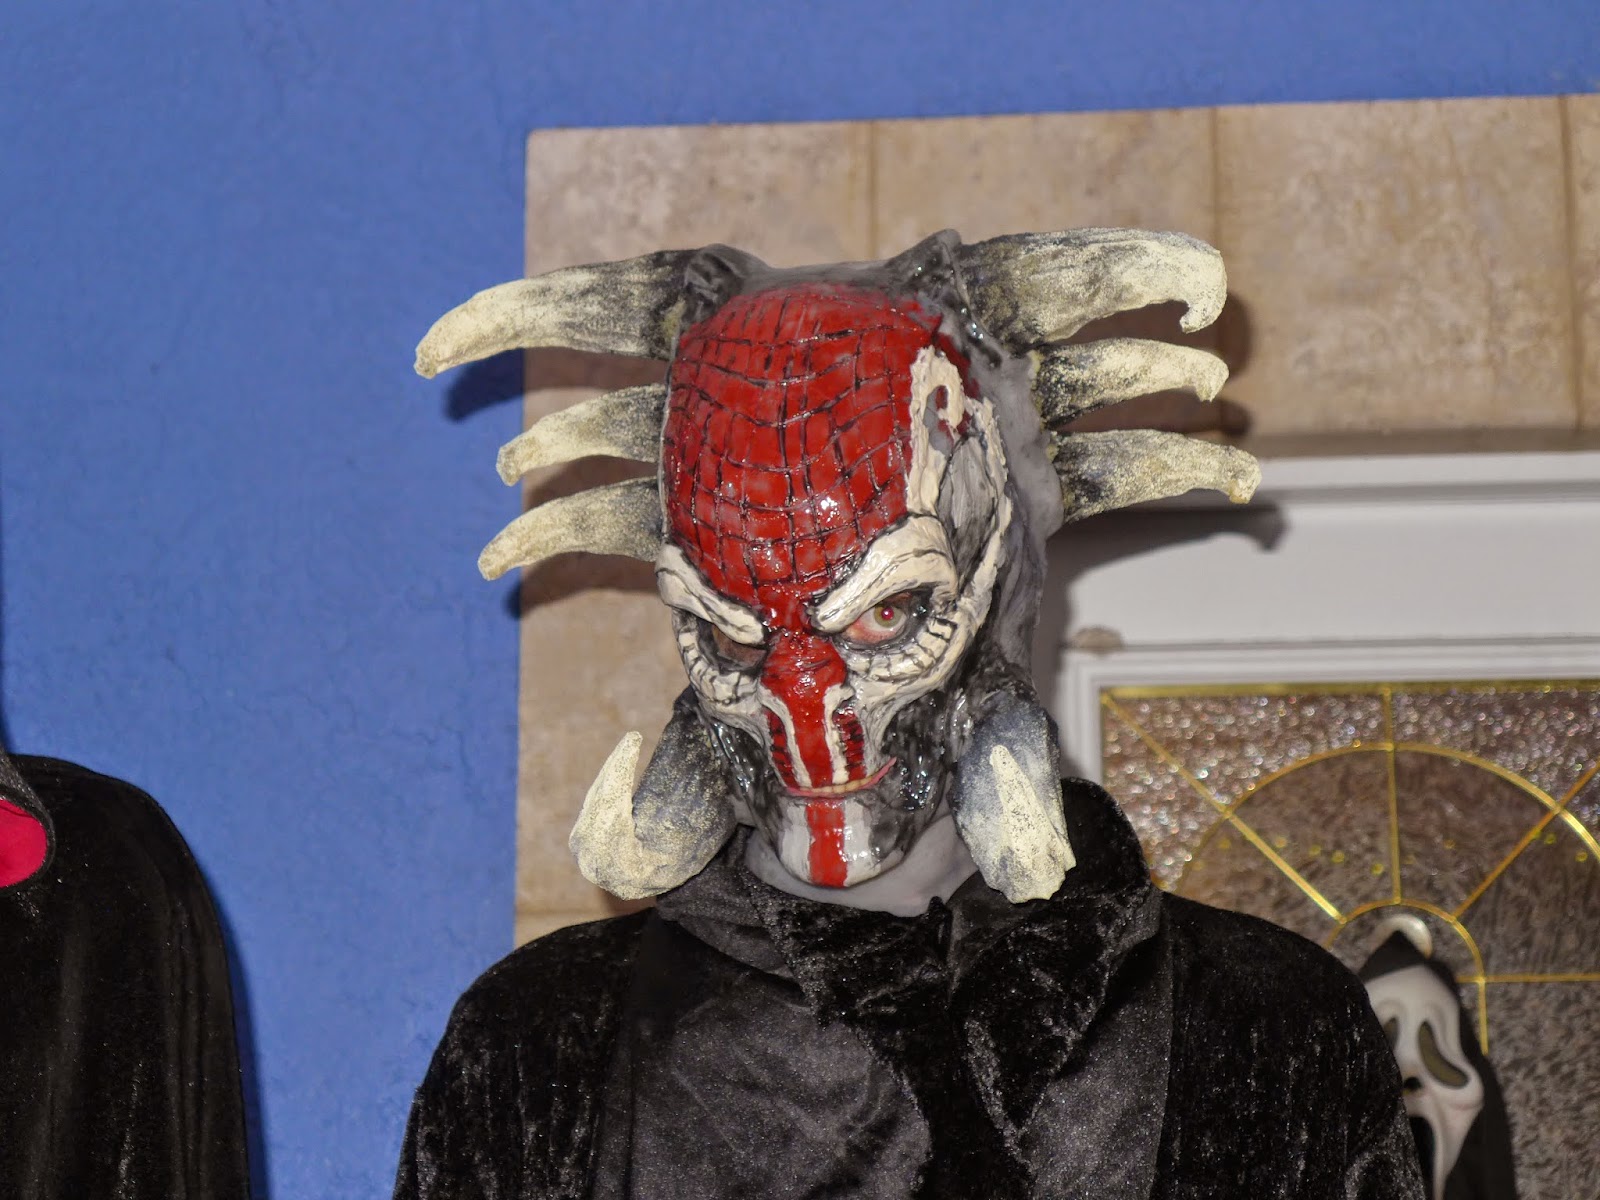
This is after halloween, I just placed the horns on it to take a picture of what it should have looked like. They still will have to be cemented on once I get more silicone, but who knows when that will be.
So all in all it wasn't at all a failure but it just wasn't the level of greatness I hoped to get when I originally had the idea. In hindsight, i should probably not try to be a character from a movie that hasn't been released yet since there aren't many good reference pictures to use an I should also start a project like this even earlier in the year, like the beginning of September. So with that said, Happy late Halloween I guess...
More posts to come next year, in the mean time check out Wrightworks on blogger!


